Hi all!
For a few months now I've been working to build my own DS made of wood.
My plan is to make it as good as possible, painting it with the corresponding metal tone.
Why wood? Because I want it to be heavy, but manageable. Besides, I could only get the tools and materials to work with wood.
Let's go step by step.
The Size
For starters, I looked at many pictures and panels of Guts holding the Dragon Slayer and tried to find a front, somewhat proportioned one.
Then, I calculated Guts height as my own (1.87 m) to make it look proportioned to me, since I'll be the one wielding it.
With some help from rules and simple calculations, these are the measures I came up with:

Following these, I think I should get a good looking DS that fits me properly.
Getting the Wood
So, I went to a friend's house who works in construction and helped me get a decent chunk of wood, big, heavy and strong enough to survive the process and look good in the end.
First, I took the measures I had calculated before and started drawing on the wood.


Cutting the Blade
Once we got the layout of how it had to be, my friend took the plank and we got ready to cut it with a pretty cool saw.


The final result was the raw blade of the Dragon Slayer.


Adding the Grip, molding the Edge
We started to subtract wood from the sides to make the edge. After that, the next step would be to sand down the imperfections and make it look as smooth as possible.
The grip, on the other hand, is made by a pretty hard steel pipe, attached to the base of the blade.


Of course, this alone is not enough to hold the weight of the blade. As it was, the wood would break at the junction point with the grip.
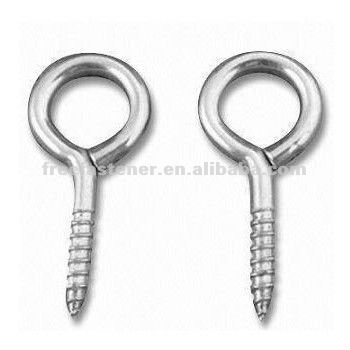
So we still needed to add the semicircular parts on the base to give the grip the necessary strength. We thought six sturdy screws made for wood would do the job.


Meanwhile, we kept adding details to the edge.


Screwing the Grip
This ended up being trickier than we'd thought.
We first perforated each plank of wood separately, then aligned them and inserted the screws as tight as possible.

The final result was pretty good. Strong enough to finally hold it and actually wield it without breaking it!


Adding details to the Edge
With some time and patience we were able to finally make the edge look more or less like... well.. an edge.
So, a couple of weeks passed and I finally got the time and vehicles to move the Proto-DragonSlayer to a more comfortable place to work with it, now that no more saws and machinery are needed: just me and the little details now. With help from more people I then moved it to my house for more testing, adjusting proportions and little details to the edge.


It turns out wood is a little tricky to work with. As you will see in the next picture, the sides didn't turn out exactly perfect. The next step will be make it look as straight as possible before painting.


I'm confident it'll turn out just fine, though.
I think the hardest part (to make it have the general shape of the DS) is done, and now with time, precise and patient work the next pieces will add up making a very acceptable final result.

Smoothing
Well, this part required us to move the DS around from place to place. I needed help from some friends to do it, but we managed to get the sword to a place safe for working with it. Sorry for the lack of photos of this stage, but I was moving to my new home and everything was a mess.

Adding details to the Grip and Painting
Once the blade was done, it was time to give the final touches to the grip before painting the sword. For this I used Plasterwork (I'm not sure this is the right term in english. In spanish, it Enduido Plástico) and then I sanded it down until it was smooth.

With the grip complete, it was time to paint it ang give it a metallic look. I used silver metallic spray for this part of the process.


Almost there!
Testing and Wielding (Cosplay)
As I mentioned before, I managed to finish the Dragon Slayer just in time for a Convention here in Argentina. These are some photos I took over there during the weekend. I hope you like them!!


Placing it on Display
Well, the original idea was to place it above my bed, but my couple wasn't very fond of the thought of sleeping with a large wooden stick above her head. In the end, we decided to place it in the living room, right next to the stairs to the second floor. I got help from yet another friend and we started to work.


And the final image of the project:

Well, I hope you like this little project and if you want to give comments, feedback, criticism or questions, just fire away.
Even though it's still a work in progress, I've put a lot of time and effort doing it (and my friend too), so I hope it will end up looking good. it's done, I still have to see how it will be placed in my room, which is no easy feat to accomplish.
I'll keep you posted!
Done!
For a few months now I've been working to build my own DS made of wood.
My plan is to make it as good as possible, painting it with the corresponding metal tone.
Why wood? Because I want it to be heavy, but manageable. Besides, I could only get the tools and materials to work with wood.
Let's go step by step.
The Size
For starters, I looked at many pictures and panels of Guts holding the Dragon Slayer and tried to find a front, somewhat proportioned one.
Then, I calculated Guts height as my own (1.87 m) to make it look proportioned to me, since I'll be the one wielding it.
With some help from rules and simple calculations, these are the measures I came up with:
Following these, I think I should get a good looking DS that fits me properly.
Getting the Wood
So, I went to a friend's house who works in construction and helped me get a decent chunk of wood, big, heavy and strong enough to survive the process and look good in the end.
First, I took the measures I had calculated before and started drawing on the wood.
Cutting the Blade
Once we got the layout of how it had to be, my friend took the plank and we got ready to cut it with a pretty cool saw.
The final result was the raw blade of the Dragon Slayer.
Adding the Grip, molding the Edge
We started to subtract wood from the sides to make the edge. After that, the next step would be to sand down the imperfections and make it look as smooth as possible.
The grip, on the other hand, is made by a pretty hard steel pipe, attached to the base of the blade.
Of course, this alone is not enough to hold the weight of the blade. As it was, the wood would break at the junction point with the grip.
So we still needed to add the semicircular parts on the base to give the grip the necessary strength. We thought six sturdy screws made for wood would do the job.
Meanwhile, we kept adding details to the edge.
Screwing the Grip
This ended up being trickier than we'd thought.
We first perforated each plank of wood separately, then aligned them and inserted the screws as tight as possible.
The final result was pretty good. Strong enough to finally hold it and actually wield it without breaking it!
Adding details to the Edge
With some time and patience we were able to finally make the edge look more or less like... well.. an edge.
So, a couple of weeks passed and I finally got the time and vehicles to move the Proto-DragonSlayer to a more comfortable place to work with it, now that no more saws and machinery are needed: just me and the little details now. With help from more people I then moved it to my house for more testing, adjusting proportions and little details to the edge.
It turns out wood is a little tricky to work with. As you will see in the next picture, the sides didn't turn out exactly perfect. The next step will be make it look as straight as possible before painting.
I'm confident it'll turn out just fine, though.
I think the hardest part (to make it have the general shape of the DS) is done, and now with time, precise and patient work the next pieces will add up making a very acceptable final result.
Smoothing
Well, this part required us to move the DS around from place to place. I needed help from some friends to do it, but we managed to get the sword to a place safe for working with it. Sorry for the lack of photos of this stage, but I was moving to my new home and everything was a mess.
Adding details to the Grip and Painting
Once the blade was done, it was time to give the final touches to the grip before painting the sword. For this I used Plasterwork (I'm not sure this is the right term in english. In spanish, it Enduido Plástico) and then I sanded it down until it was smooth.
With the grip complete, it was time to paint it ang give it a metallic look. I used silver metallic spray for this part of the process.
Almost there!
Testing and Wielding (Cosplay)
As I mentioned before, I managed to finish the Dragon Slayer just in time for a Convention here in Argentina. These are some photos I took over there during the weekend. I hope you like them!!
Placing it on Display
Well, the original idea was to place it above my bed, but my couple wasn't very fond of the thought of sleeping with a large wooden stick above her head. In the end, we decided to place it in the living room, right next to the stairs to the second floor. I got help from yet another friend and we started to work.
And the final image of the project:
Well, I hope you like this little project and if you want to give comments, feedback, criticism or questions, just fire away.
I'll keep you posted!
Done!
Last edited:


 )
)