You are using an out of date browser. It may not display this or other websites correctly.
You should upgrade or use an alternative browser.
You should upgrade or use an alternative browser.
1:1 scale replica of Berserker Helmet!!! ***SOLD OUT***
- Thread starter DirectDK
- Start date

Re: 1:1 scale replica of Berserker Helmet!!!
Hehe, now that's the spirit I like to see!
Alright folks. HERE ARE SOME NEW PICTURES. From James:
ALSO, James has only received a few deposits from people, and thus he doesn't have much funding to put towards all the materials that goes into each helmet. It would be REALLY useful if those that are interested in the helmet to put down your deposit ASAP. Please act soon! How can you resist anyways!? =)
Lithrael said:This thing is going to be HOT. OK, I just can't stay out of the water on this one. Holy shit!
Now, off to Ebay my Monty Python's Sir Bedevere helmet to help me pay for it... heheheh...
Hehe, now that's the spirit I like to see!
Alright folks. HERE ARE SOME NEW PICTURES. From James:
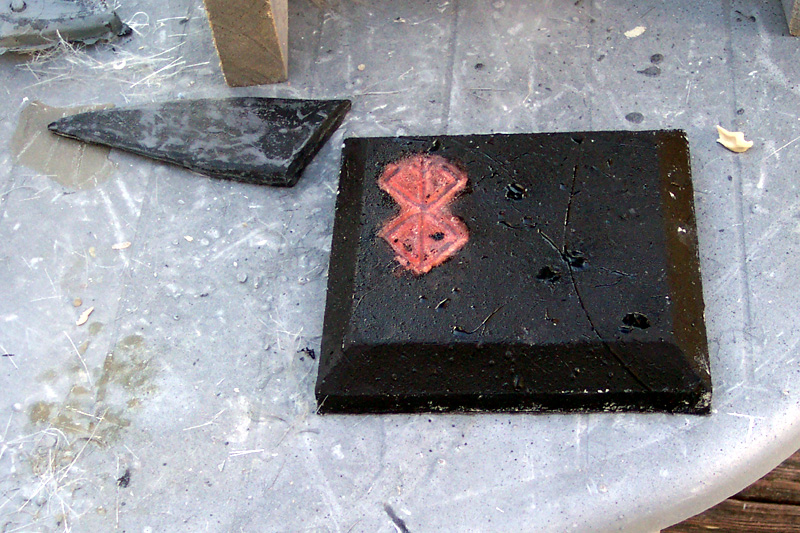
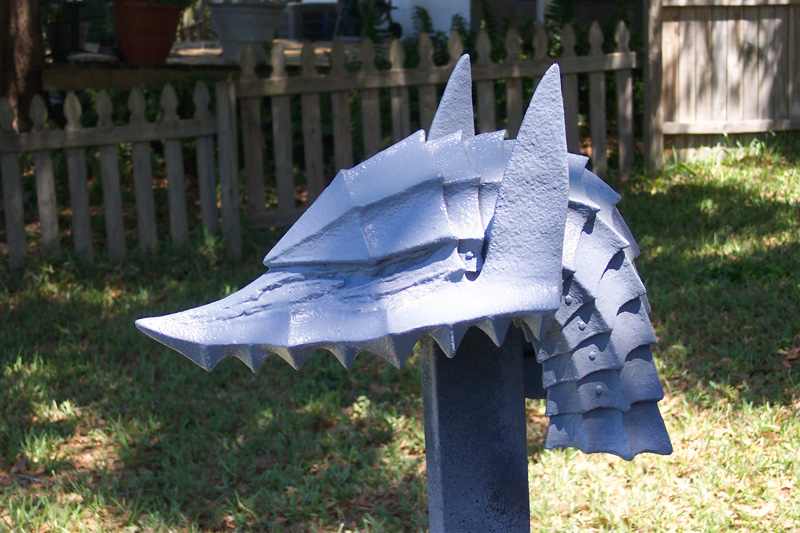
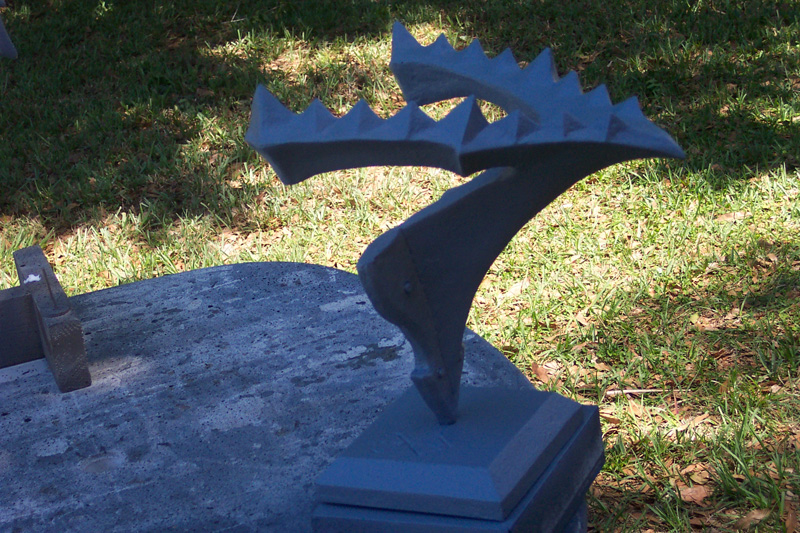
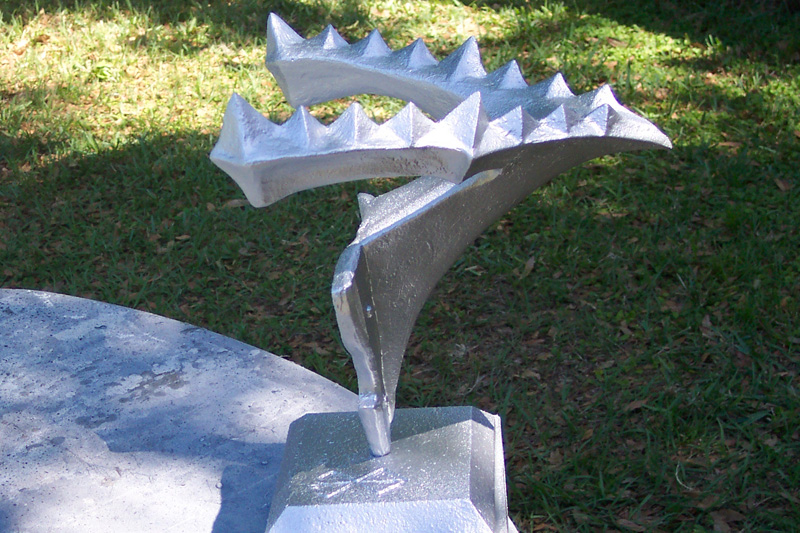
Here are the first two helmets out of the mold. One is black because the gelcoat I used was black and the other is gray because I was running low on black and mixed white gel cote to extended it out (irrelevent--I could of used hot pink if I wanted). The "Z" shapes and the sacrifice brand was cast with clear gel cote with red catalyst for a good tint. It will look sweet with the red lights behind it. I still have alot of clean-up to do on these pieces (i.e. seam work, air voids, and sanding to reveal the proper texture.) More pics to come soon.
Oh yeah, and the clear with red in it has been cast much further than it needs to. I'll be able to paint over and behind to tighten the shapes better and keep the clear only where it needs to be.
ALSO, James has only received a few deposits from people, and thus he doesn't have much funding to put towards all the materials that goes into each helmet. It would be REALLY useful if those that are interested in the helmet to put down your deposit ASAP. Please act soon! How can you resist anyways!? =)
Re: 1:1 scale replica of Berserker Helmet!!!
Added!
HITReza said:i took a little long but i JUST NOW send the 250 dollars with paypal!
;)
Added!
Re: 1:1 scale replica of Berserker Helmet!!!
I am short with cash for the moment but as soon as I recover, I will send you my part ;)
Anyway, I think people WANT to see the finished product before paying.
I meen, what will be the base, the final textures and colors etc... If James could send you some pictures, it would probably boost the enthousiasm.
Re: 1:1 scale replica of Berserker Helmet!!!
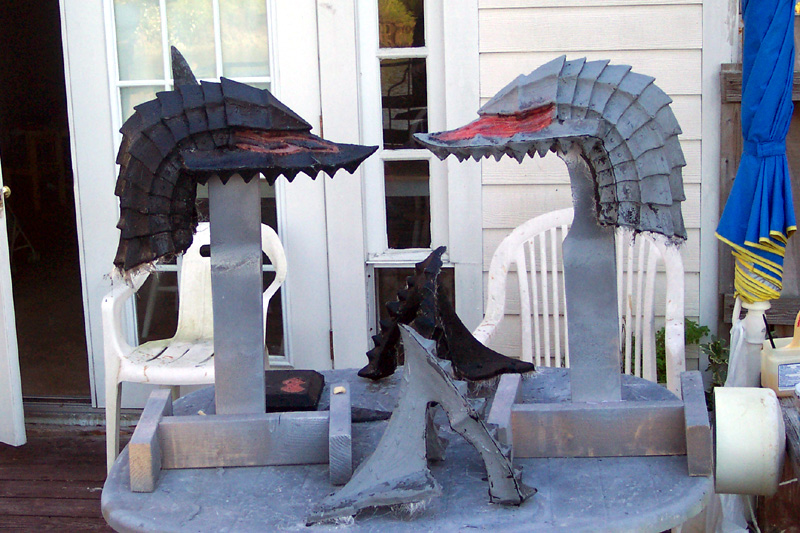
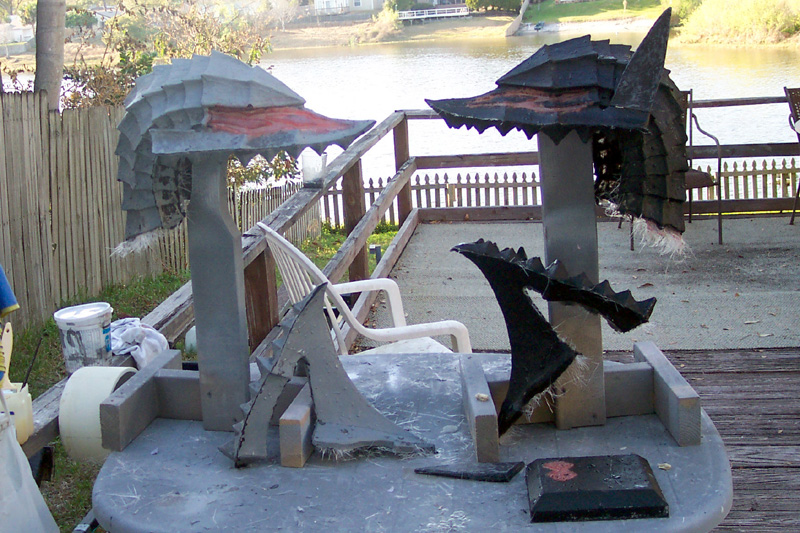
Yo yo!
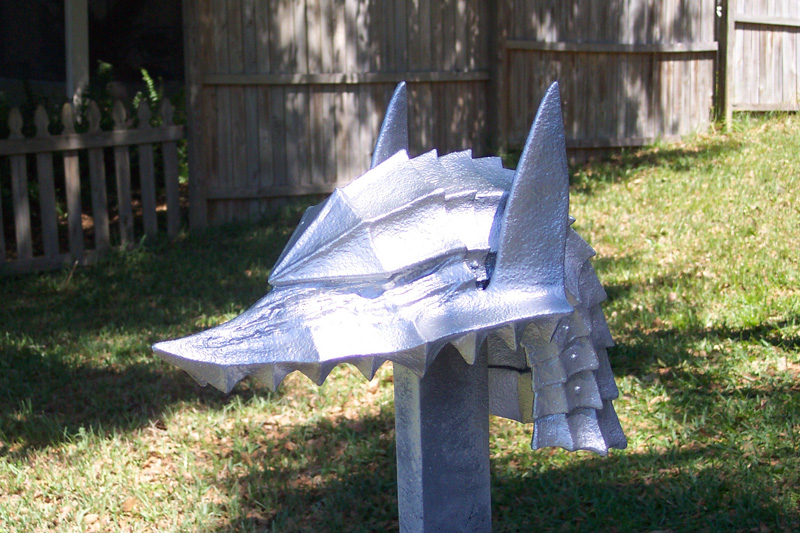
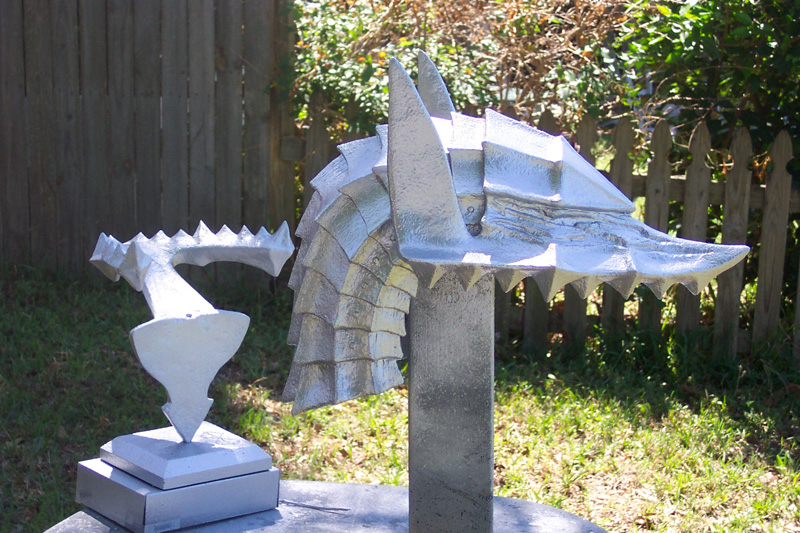
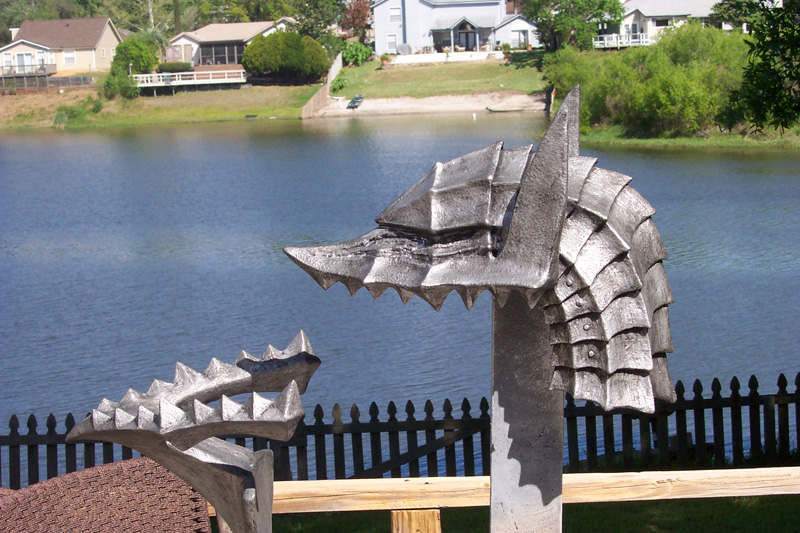
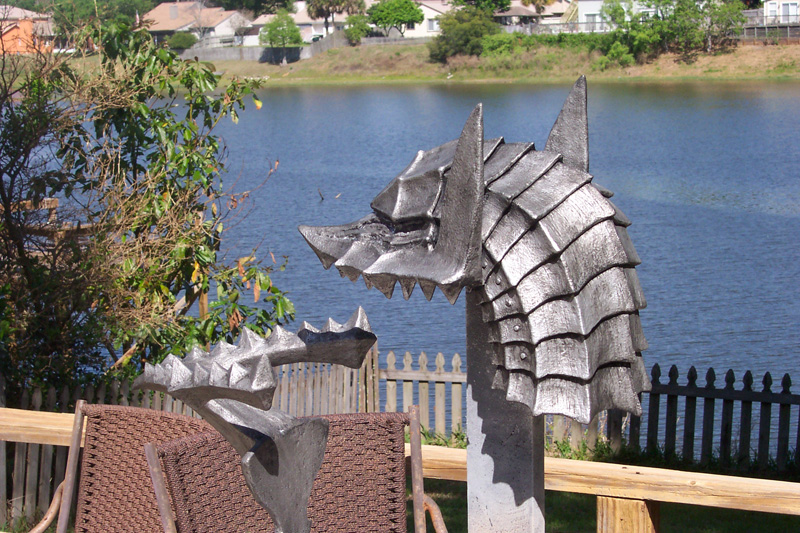
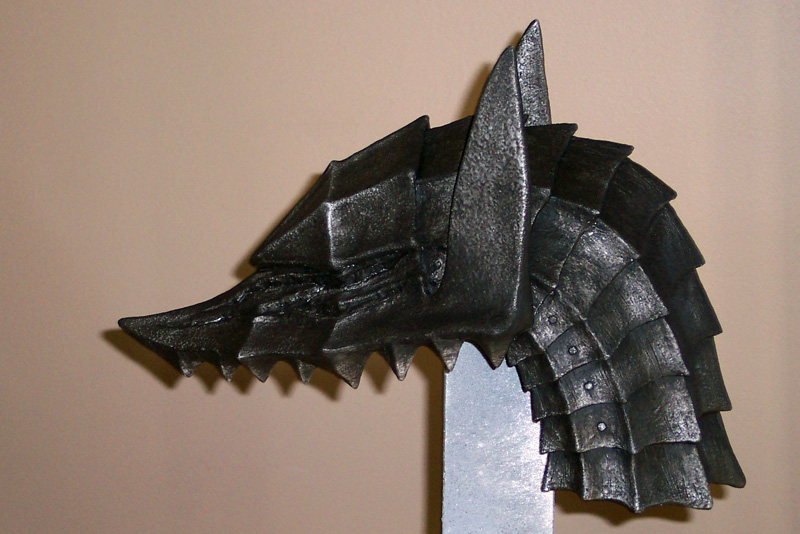
Quick update! Here is the first look at the assembly of the helmet. Right now, they are just propped up to show what it will roughly look like when assembled. James would like to use clear acrylic for the support, but if isn't strong enough, he'll have to maybe use the threaded rod and paint it the same color as the armor to make it less noticeable.
From James:

And of course, the obligatory: PUT IN YOUR DEPOSITS FOLKS!
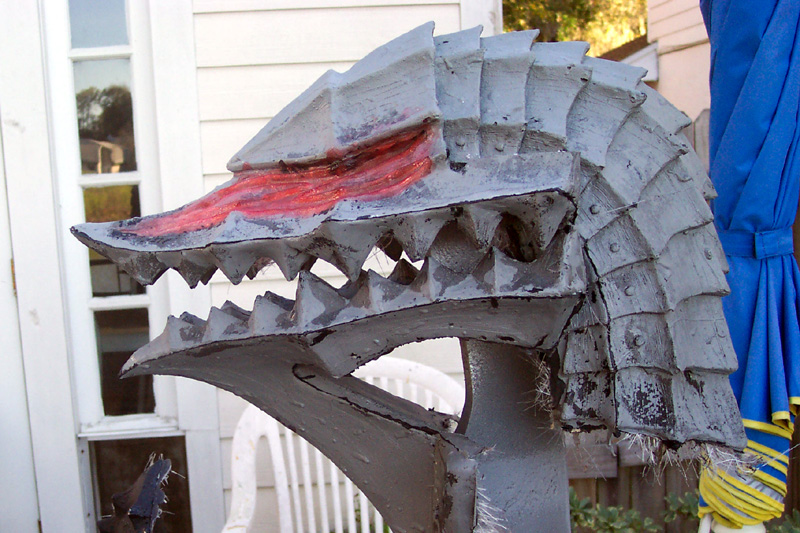
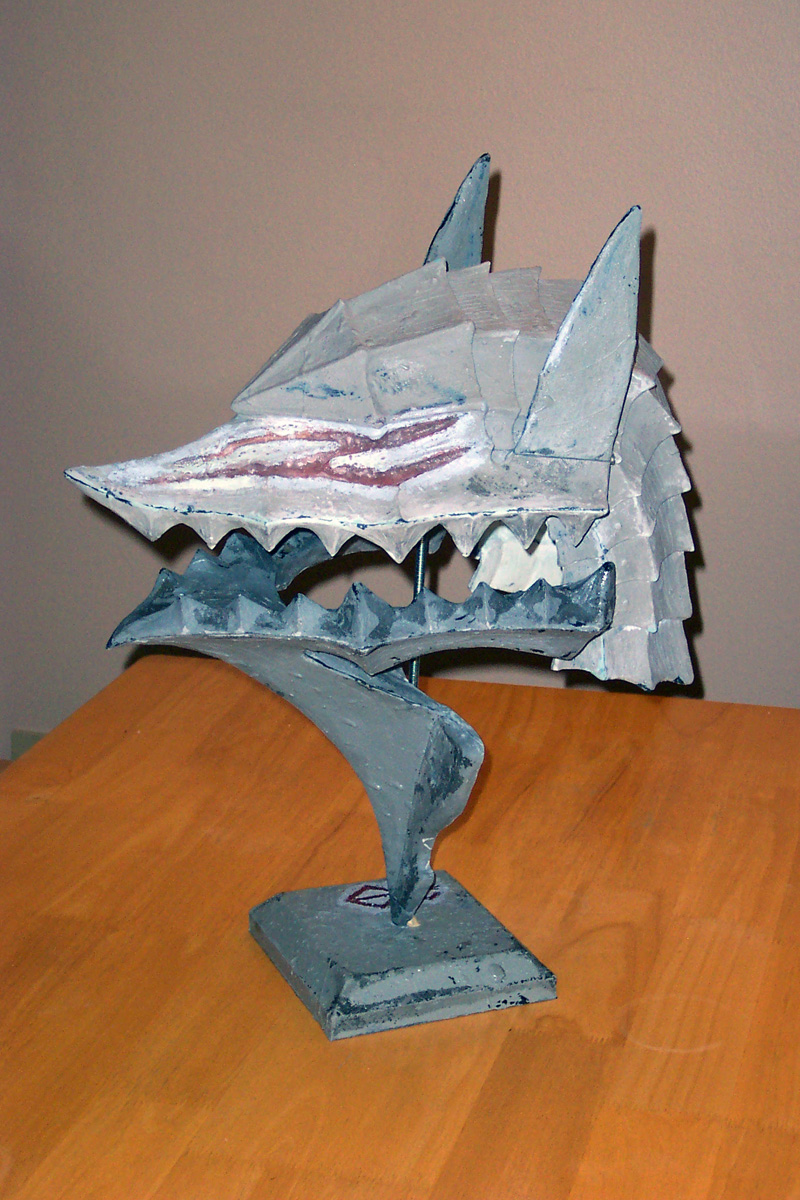
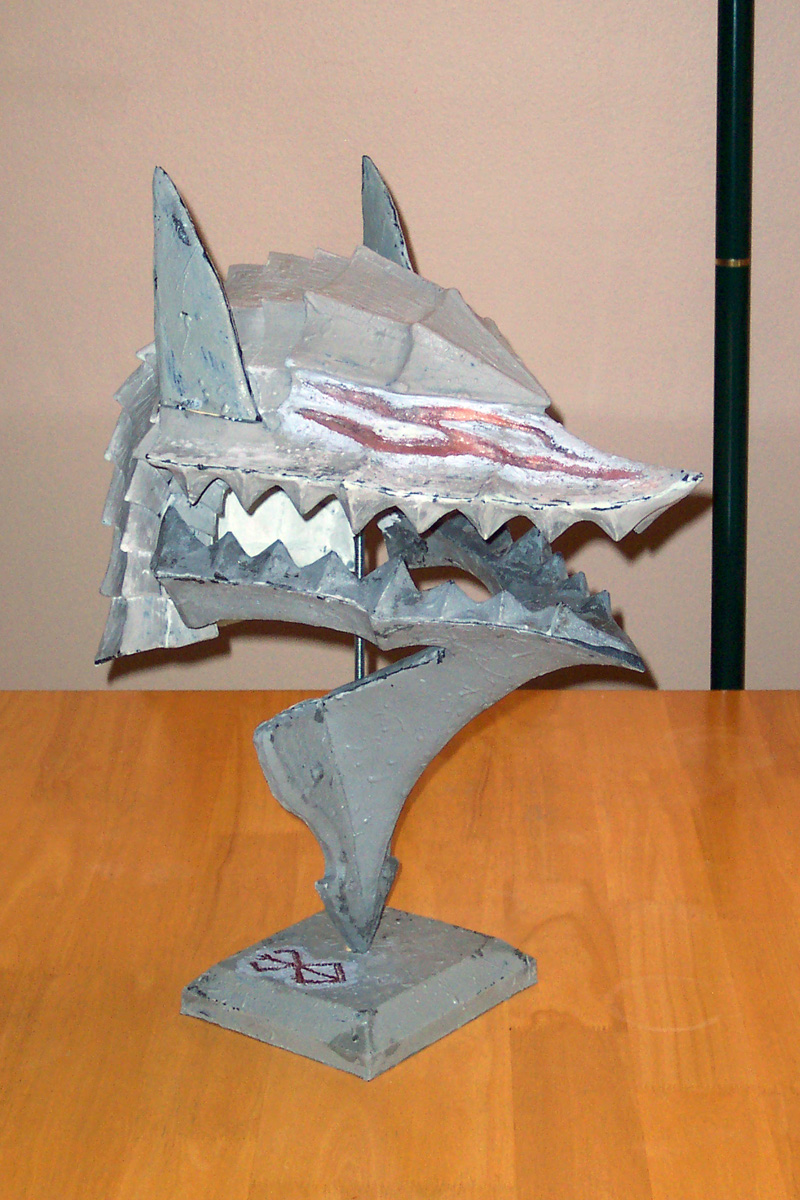
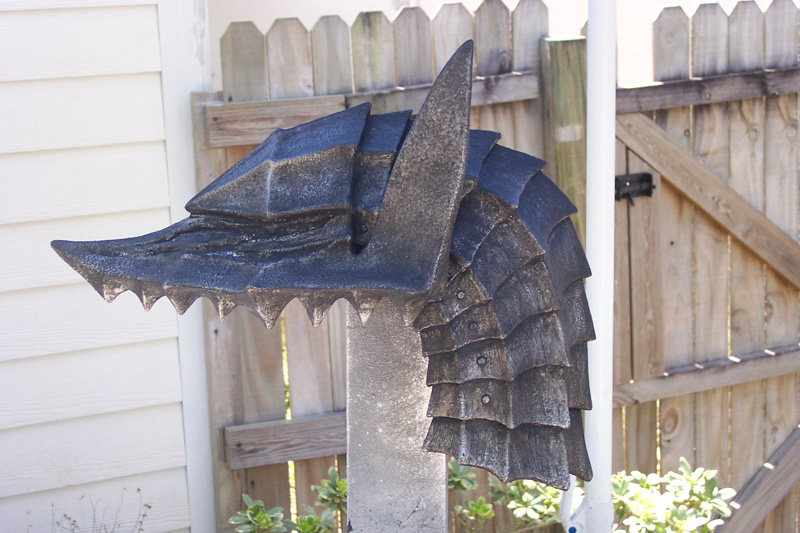
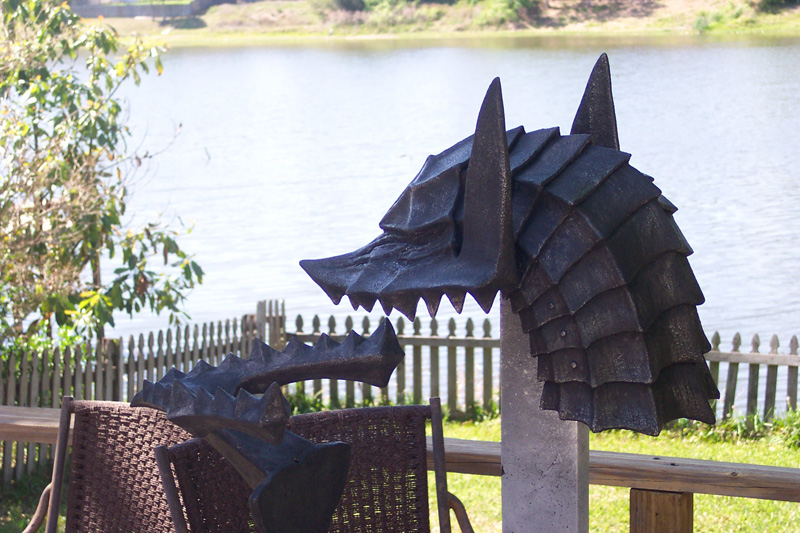
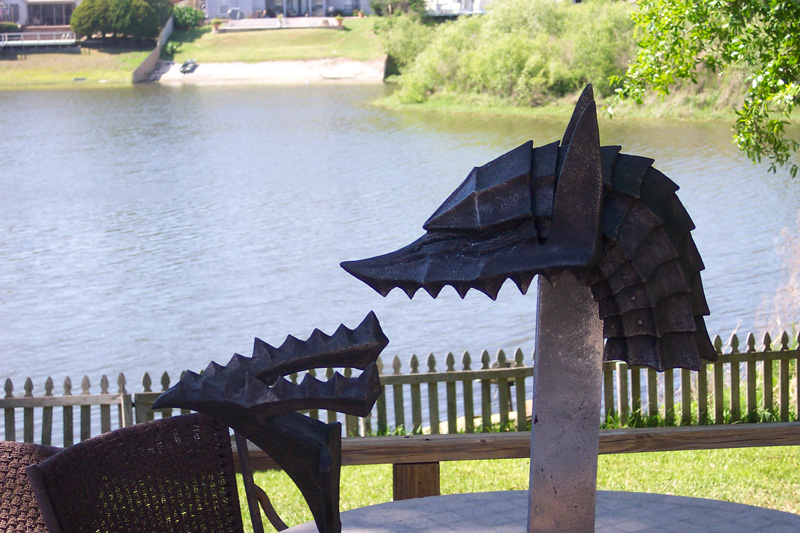
Yo yo!
Quick update! Here is the first look at the assembly of the helmet. Right now, they are just propped up to show what it will roughly look like when assembled. James would like to use clear acrylic for the support, but if isn't strong enough, he'll have to maybe use the threaded rod and paint it the same color as the armor to make it less noticeable.
From James:
I figured I'd take these VERY early pics because nobody has seen it all put together yet. I still haven't dealt with the texture yet. I'm spending much of my time producing all the parts out of the molds from how many orders I have. Note I brushed on some light gray primer around the "Z" shape and brand to tighten up the shapes a little.
And of course, the obligatory: PUT IN YOUR DEPOSITS FOLKS!
Re: 1:1 scale replica of Berserker Helmet!!!
Hi all! James will be starting to paint the first batch (4 of them) next week!! He asked me if he should paint blood on it, and I thought I'd ask what you think first. Especially for the ones that have put a deposit down already, what do you prefer?
Me personally, as much as I love blood on anything Guts related, I am kinda opting to a no-blood helmet...
Speak up folks!
Re: 1:1 scale replica of Berserker Helmet!!!
he told me before that i would be #3. if that's still true, give me blood!
DirectDK said:Hi all! James will be starting to paint the first batch (4 of them) next week!! He asked me if he should paint blood on it, and I thought I'd ask what you think first. Especially for the ones that have put a deposit down already, what do you prefer?
he told me before that i would be #3. if that's still true, give me blood!
Re: 1:1 scale replica of Berserker Helmet!!!
Mine should be #7 so hopefully it will be in the next batch, but I want a no-blood version.
DirectDK said:Especially for the ones that have put a deposit down already, what do you prefer?
Mine should be #7 so hopefully it will be in the next batch, but I want a no-blood version.
Re: 1:1 scale replica of Berserker Helmet!!!
Why am I just seeing this now?! I guess after my last Berserk statue purchases I quenched my thirst... but after seeing this... I'm... I'm thirsty again!
I want! DK, I'll PM you. Put me down for one.
Though I'm not sure if I want bloody or non-bloody. I'm leaning towards bloody but I would like to see them both if possible - I know I'll be late in line so I think I'll pictures will come up before I have to finalize my answer.
Re: 1:1 scale replica of Berserker Helmet!!!
Forgot what # I am but can't decide on either?! Yeah, yeah, I'm the one that brought up the bloody idea but now can't decide. Like DirectDK said, blood is usually cool. But IMHO, this item is only a bust and static-looking so wouldn't warrant any blood. Huh, would be nice to see both.
For now, I pick no blood. Another thing I can't wait to see are those lighted red eyes!
Forgot what # I am but can't decide on either?! Yeah, yeah, I'm the one that brought up the bloody idea but now can't decide.
Like DirectDK said, blood is usually cool. But IMHO, this item is only a bust and static-looking so wouldn't warrant any blood. Huh, would be nice to see both. For now, I pick no blood. Another thing I can't wait to see are those lighted red eyes!
Re: 1:1 scale replica of Berserker Helmet!!!
Painting pictures coming soon! James got set back a few days because of the rain (he works outside). But, here are some updated shots of one of the helmets primed and coated!
Haha, "frakkin". I miss my BSG =(. Anyhow, onwards to the pictures!

Painting pictures coming soon! James got set back a few days because of the rain (he works outside). But, here are some updated shots of one of the helmets primed and coated!
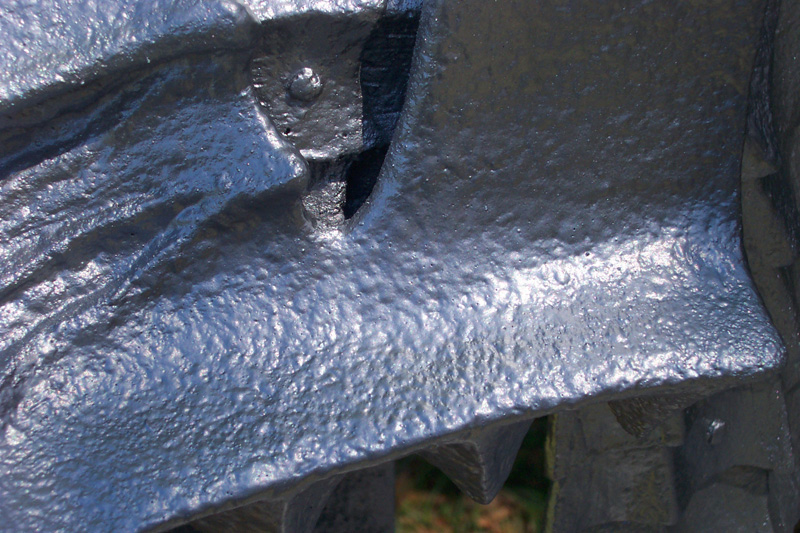
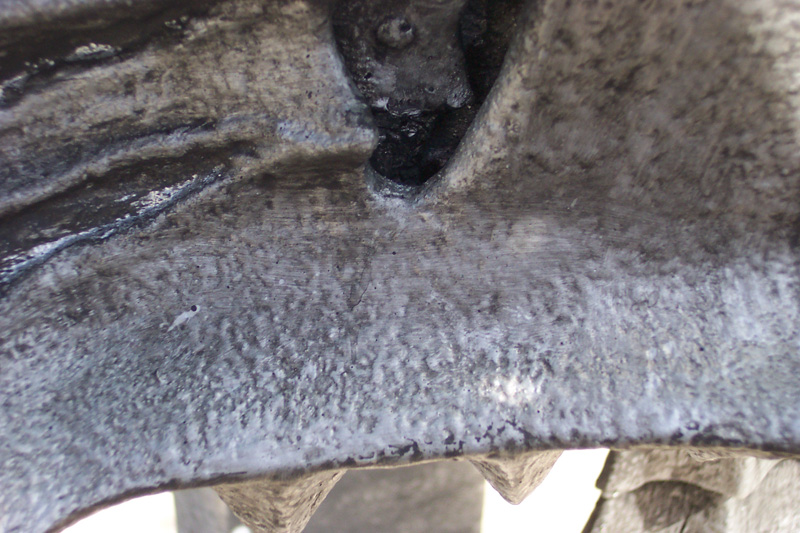
Here is the first couple of steps in the painting process. The first couple of pics are the primed pictures (sorry about the shadows--frakkin trees). The next four are the helmet base coated a metalic color. It's just the base coat--there will be other steps (washes, sponge application of colors, and dry brushing) Those are the steps I'll do tomorrow. The last pic is a close up of the texture. It will look even better when it is finished.
You'll notice it looks like I painted over the eye and brand windows--no worries--I applied a few thick layers of liquid latex. When I'm done I'll cut along the edges and peel off the latex revealing the clear window.
Haha, "frakkin". I miss my BSG =(. Anyhow, onwards to the pictures!
Re: 1:1 scale replica of Berserker Helmet!!!
Hahaha, can't say I haven't thought about it
Real quick update again. These are just a few pictures with a new wash. It'll be darker later on, as James will add a second darker wash on top of this, after it dries. But I'm posting this because I just have to share with y'all how AMAZING the texture looks. SWEETNESSSS!
Fusiongt said:Is it me, or does anyone else want to stick that on top of their head? lol
Hahaha, can't say I haven't thought about it
Real quick update again. These are just a few pictures with a new wash. It'll be darker later on, as James will add a second darker wash on top of this, after it dries. But I'm posting this because I just have to share with y'all how AMAZING the texture looks. SWEETNESSSS!
Re: 1:1 scale replica of Berserker Helmet!!!
NEW PICS!
Wash 2 (not final)
Wash3 (final)
And lastly, from James:
I should have some dry brush pics up later tonight, or tomorrow.
NEW PICS!
Wash 2 (not final)
Wash3 (final)
And lastly, from James:
My next step will be to dry brush some metallics back into the piece and pick up some highlights.
I should have some dry brush pics up later tonight, or tomorrow.
Re: 1:1 scale replica of Berserker Helmet!!!
It's so very, very fucking amazing. I'm entirely impressed. This month has made me really proud to be even a small part of Skullknight.net.
It's so very, very fucking amazing. I'm entirely impressed. This month has made me really proud to be even a small part of Skullknight.net.
G
Genome
Guest
Re: 1:1 scale replica of Berserker Helmet!!!
It's impressive. Very cool, and now it's sure.
It's impressive. Very cool, and now it's sure.